- Posts: 56
- Thank you received: 0
Wheel well cleaning
- PCA0891
-
 Topic Author
- Offline
- Junior Member
-

Less
More
05 May 2013 13:38 #14601
by PCA0891
Wheel well cleaning was created by PCA0891
Hi friends.
Starting in the a m I will be removing my wheels and attempting to clean up all the mess that has accumulated over the last 24 years in the wheel well area including all associated parts.
Question: What "products" do you all think would work best in this application. I would like things to appear "as close" to new as possible. I'm sure that will be a tall order and most likely quite time consuming but it is next on my list. Anyone with helpful tips for this task I would sure be grateful.
Thanks in Advance
Please Log in or Create an account to join the conversation.
- pcar928fan
-

- Offline
- Platinum Member
-

Less
More
- Posts: 2210
- Thank you received: 2
05 May 2013 15:58 #14604
by pcar928fan
James
78 Silver / Black-white #295
84 Ruby Red / Black AO84
88 Dark Blue / Linen-Black
92 Polar Silver / Dark Blue 92EURO
93 Arrow Blue / Black
Replied by pcar928fan on topic Wheel well cleaning
Robert,
I always just tried to keep it simple...as in Simple Green! You need to rinse it very well after you are done with the cleaning though and get all residue and left over off the parts. Other than that it seems to be very safe and effective to me... DO NOT use things like Easy Off oven cleaner though! LOL! I accidentally got that on my anodized wheels once and that was NOT GOOD!!!
I always just tried to keep it simple...as in Simple Green! You need to rinse it very well after you are done with the cleaning though and get all residue and left over off the parts. Other than that it seems to be very safe and effective to me... DO NOT use things like Easy Off oven cleaner though! LOL! I accidentally got that on my anodized wheels once and that was NOT GOOD!!!
James
78 Silver / Black-white #295
84 Ruby Red / Black AO84
88 Dark Blue / Linen-Black
92 Polar Silver / Dark Blue 92EURO
93 Arrow Blue / Black
Please Log in or Create an account to join the conversation.
- mm928
-
- Offline
- Moderator
-

Less
More
- Posts: 799
- Thank you received: 9
06 May 2013 17:18 #14618
by mm928
1983 928S - 16v 4.7L L-Jetronic
Slate Blue Metallic w/ Blue Leather
85/86 exhaust manifolds
Y-Pipe
SS Hi-perf Cat
S4 springs
Bilstein shocks
Air pump delete
VIN: WP0JB0926DS861180
- - Isn't Life great? - -
Replied by mm928 on topic Wheel well cleaning
Good point. also it is an 88, on my 83 the back part of the wheel well is not metal, so if yours is not as well be careful.
I would think Simple Green is a good option as well to start with because it is not caustic and should work on oil....dirt....mud and other typical road accumulation. Maybe a good stiff horsehair brush etc. to break it up as needed. I would be careful using wire I would think.
I would think Simple Green is a good option as well to start with because it is not caustic and should work on oil....dirt....mud and other typical road accumulation. Maybe a good stiff horsehair brush etc. to break it up as needed. I would be careful using wire I would think.
1983 928S - 16v 4.7L L-Jetronic
Slate Blue Metallic w/ Blue Leather
85/86 exhaust manifolds
Y-Pipe
SS Hi-perf Cat
S4 springs
Bilstein shocks
Air pump delete
VIN: WP0JB0926DS861180
- - Isn't Life great? - -
Please Log in or Create an account to join the conversation.
- Normy1
-
- Offline
- Senior Member
-

Less
More
- Posts: 118
- Thank you received: 0
06 May 2013 20:23 #14622
by Normy1
Replied by Normy1 on topic Wheel well cleaning
Forget about the Simple Green. Folks, this is 24 YEARS of grime! I recommend a high pressure hose, and a scrub brush with nylon bristles about 3 inches long. Get your self a bottle of Soft Scrub, maybe two.
For the front wheels, why not do it right and remove the plastic wheel well liners? There are a bunch of screws....just place them on a piece of paper about 25 feet away and make note of where they go. Pull the thing down [I've done it 4-5 times, it is not a big deal], and THEN go to town on it! When it is down, clean your springs. Use non-flammable break parts cleaner to clean the aluminum upper and lower A-arms; Dawn dish detergent is the best after you've gotten the baked-on grease off.
Reassembly goes easier if you take pictures first, but the huge plastic front wheel well liner is pretty self explanatory. The rear? Pull the wheel and get up there with the same scrub brush. You are going to throw this brush away, don't worry about it. Soft Scrub works best, make sure you get the springs.
Now, when everything is hosed down and eventually dry...
Whenever you wash your car, when you are done, make sure you shoot a shot of Armor-All in front of the front wheels, behind them, and then do the same to the rear. Once your wheel wells are clean, you want them to look as dark as possible, and Armor-All is best for this.
Little details such as clean wheel wells are what make people walk up to you and ask if a 28 year old car is new-
N!
Please Log in or Create an account to join the conversation.
- PCA0891
-
Topic Author
- Offline
- Junior Member
-
Less
More
- Posts: 56
- Thank you received: 0
07 May 2013 14:02 #14627
by PCA0891
Replied by PCA0891 on topic Wheel well cleaning
Thanks for all the words of wisdom all. Yesterday I proceeded down to the local Auto Parts shop and found all the bits I need.
Two Jack Stands, One bottle of Simply Green and several different type's of wire brushes. I never really put my nose up inside the wheel wells to see how dirty the wheel well area's are on my car. you all were right 25 years and 75k worth of miles mess.
Jacked her up front end first, I don't really like the idea of my whole car up on stands at once. So I'm doing the front first. Removed my Turbo Twists and sprayed the insides down with Simply Green and scrubbed them down with my grill scraper the wire brush side. Rinsed them out and what a huge difference. I had these wheels refinished last winter and they look like the day I picked them up from the Wheel shop. Just wish there was a way to keep them looking like that all the time without having to remove them.
Now back to the project at hand. I took the high pressure sprayer to the well wells but I did not remove the actual inserts themselves. " To stupid to get them back in correctly". Anyway,, I got most of the big stuff off and then sprayed the entire wheel well down with Simply Green. I let it soak for about 15 minutes and then proceeded to scrape.
I was able to remove most of the big stuff with the long handled wire brush and then sprayed her off with water again. Thinking like I do I was hoping that would do it... Na. Next step. Hit it again with SG and I took a fist size wire brush and began to hit all the moving parts... OK, I'm about 3 hours in and finally the progress I was after. I then went to the other side...
Man what a difference. Everything was shiny and looking new again. Amazing stuff Simply Green. I was skeptical at first but that stuff really works well. Thanks for all the idea's guy's... It worked out well.
A short side story
Last winter when Austin and I had my car apart doing all the Refresh work I had thought about re-painting my Caliper's and so while the wheels were off and everything was as clean as it would ever be again, I went ahead and re-sanded down the Calipers sprayed them down and let sit overnight to dry.
This morning I strolled back down to Auto Zone and bought a fresh can of Daytona Yellow. I always thought that yellow would really set off the Black Paint and dark tinted windows my car came with. I then masked everything off and proceeded to change the whole look of the Beast. I taped off all lines, masked off everything including the whole fender and proceeded to spray. I'm happy to say that even with no prior experience and just reading through one of the tip forum's they turned out great...
I know have about 8 true hours of work done, the Wheel wells and Calipers look fantastic.
Tomorrow I will tackle the rear... Certainly a project with clear results.
My expectation is that the rear's will look just as good.
Please Log in or Create an account to join the conversation.
- mm928
-
- Offline
- Moderator
-
Less
More
- Posts: 799
- Thank you received: 9
07 May 2013 17:25 #14630
by mm928
1983 928S - 16v 4.7L L-Jetronic
Slate Blue Metallic w/ Blue Leather
85/86 exhaust manifolds
Y-Pipe
SS Hi-perf Cat
S4 springs
Bilstein shocks
Air pump delete
VIN: WP0JB0926DS861180
- - Isn't Life great? - -
Replied by mm928 on topic Wheel well cleaning
Alright, that is using some elbow grease....where do we send the Advil?????
1983 928S - 16v 4.7L L-Jetronic
Slate Blue Metallic w/ Blue Leather
85/86 exhaust manifolds
Y-Pipe
SS Hi-perf Cat
S4 springs
Bilstein shocks
Air pump delete
VIN: WP0JB0926DS861180
- - Isn't Life great? - -
Please Log in or Create an account to join the conversation.
- pcar928fan
-
- Offline
- Platinum Member
-
Less
More
- Posts: 2210
- Thank you received: 2
09 May 2013 19:02 #14640
by pcar928fan
James
78 Silver / Black-white #295
84 Ruby Red / Black AO84
88 Dark Blue / Linen-Black
92 Polar Silver / Dark Blue 92EURO
93 Arrow Blue / Black
Replied by pcar928fan on topic Wheel well cleaning
DON'T USE A WIRE BRUSH!!! Nylon or horse hair ONLY!! Old tooth brushes will work ok, but they are mighty small! Here is what can be done with a wheel well! This is about 4 hours work per wheel well...or close to it!
Attached files [img]media/attachments/15007=1825-AfterFront.jpg[/img] [img]media/attachments/15007=1823-AfterRear.jpg[/img] [img]media/attachments/15007=1824-BeforeFrontMed.jpg[/img] [img]media/attachments/15007=1822-BeforeRear.jpg[/img]
Attached files [img]media/attachments/15007=1825-AfterFront.jpg[/img] [img]media/attachments/15007=1823-AfterRear.jpg[/img] [img]media/attachments/15007=1824-BeforeFrontMed.jpg[/img] [img]media/attachments/15007=1822-BeforeRear.jpg[/img]
![[img]media/attachments/15007=1825-AfterFront.jpg[/img]](http://928oc.org/test/media/attachments/15007=1825-AfterFront.jpg)
![[img]media/attachments/15007=1823-AfterRear.jpg[/img]](http://928oc.org/test/media/attachments/15007=1823-AfterRear.jpg)
![[img]media/attachments/15007=1824-BeforeFrontMed.jpg[/img]](http://928oc.org/test/media/attachments/15007=1824-BeforeFrontMed.jpg)
![[img]media/attachments/15007=1822-BeforeRear.jpg[/img]](http://928oc.org/test/media/attachments/15007=1822-BeforeRear.jpg)
James
78 Silver / Black-white #295
84 Ruby Red / Black AO84
88 Dark Blue / Linen-Black
92 Polar Silver / Dark Blue 92EURO
93 Arrow Blue / Black
Please Log in or Create an account to join the conversation.
- 928mac
-

- Offline
- Moderator
-
Less
More
- Posts: 3143
- Thank you received: 4
- PCA0891
-
Topic Author
- Offline
- Junior Member
-
Less
More
- Posts: 56
- Thank you received: 0
10 May 2013 10:43 #14647
by PCA0891
Replied by PCA0891 on topic Wheel well cleaning
Wow James, And I thought mine looked good. Hell, they look about half as good and I thought I had done a fair job. Shown up again by the master. I guess it will be a project to re-visit sometime soon. I thought I had done a pretty good job. It would appear that my elbow grease is lacking.
Thanks for the lesson my friend.
Thanks for the lesson my friend.
Please Log in or Create an account to join the conversation.
- pcar928fan
-
- Offline
- Platinum Member
-
Less
More
- Posts: 2210
- Thank you received: 2
10 May 2013 17:04 #14649
by pcar928fan
James
78 Silver / Black-white #295
84 Ruby Red / Black AO84
88 Dark Blue / Linen-Black
92 Polar Silver / Dark Blue 92EURO
93 Arrow Blue / Black
Replied by pcar928fan on topic Wheel well cleaning
Robert, you can show this one off as your own work anytime you like! ")
James
78 Silver / Black-white #295
84 Ruby Red / Black AO84
88 Dark Blue / Linen-Black
92 Polar Silver / Dark Blue 92EURO
93 Arrow Blue / Black
Please Log in or Create an account to join the conversation.
- emmanuelli
-
- Offline
- Elite Member
-

Less
More
- Posts: 425
- Thank you received: 0
15 May 2013 14:10 #14745
by emmanuelli
Replied by emmanuelli on topic Wheel well cleaning
hey guys, can i bring you my car?
Please Log in or Create an account to join the conversation.
- gcthree
-
- Offline
- Elite Member
-
Less
More
- Posts: 329
- Thank you received: 0
15 May 2013 22:03 #14758
by gcthree
Second Time Around 928 S4
Replied by gcthree on topic Wheel well cleaning
I'm in the midst of doing just this process, thinking that I'll get the undercarriage restored and then move to the engine and the source of some of the fluids draining down and coating everything in it's path.
I elevated the rear of the car and scrubbed using Simple Green and huge elbow grease, but there appears to be 24 year old cosmoline over, well, everything. I took to it with some acetone, which works to a degree, but a brass brush seemed to work best with removing it. All of the alloy suspension casting is coated with the stuff.
So, I hauled the car in the garage and elected to do it right, so wheel well liners are removed, suspension and brakes disassembled and restoration and repair are underway. The brake lines are being replaced; bleeders replaced with Speed Bleeders, and new brake wear sensors installed. Wheel hubs are off and new bearings installed. I'll replace tie rod ends once I pull the rack down. I've pulled the shock/springs and disassembled, cleaned and reassembled. (see the photo)
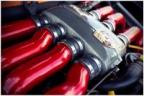
I'm using Eastwood's ( www.eastwood.com ) amazing coatings on parts. They offer an 'Underhood Black' that I semi-gloss and perfect in appearance. They also have a 'Chassis Black' that is gloss and it is an amazing, near powder-coat finish. In fact, I've used it as a touch-up on the Brembos and the gloss finish is amazing. (see the photo below; the backing plate is chassis black, and the bracket is underhood black)
A long way to go, but once you're 'in', there's no turning back!
Bob
Attached files [img]media/attachments/15126=1852-finishings.jpg[/img] [img]media/attachments/15126=1851-shocks springs.jpg[/img] [img]media/attachments/15126=1850-wheel well.jpg[/img]
I elevated the rear of the car and scrubbed using Simple Green and huge elbow grease, but there appears to be 24 year old cosmoline over, well, everything. I took to it with some acetone, which works to a degree, but a brass brush seemed to work best with removing it. All of the alloy suspension casting is coated with the stuff.
So, I hauled the car in the garage and elected to do it right, so wheel well liners are removed, suspension and brakes disassembled and restoration and repair are underway. The brake lines are being replaced; bleeders replaced with Speed Bleeders, and new brake wear sensors installed. Wheel hubs are off and new bearings installed. I'll replace tie rod ends once I pull the rack down. I've pulled the shock/springs and disassembled, cleaned and reassembled. (see the photo)
I'm using Eastwood's ( www.eastwood.com ) amazing coatings on parts. They offer an 'Underhood Black' that I semi-gloss and perfect in appearance. They also have a 'Chassis Black' that is gloss and it is an amazing, near powder-coat finish. In fact, I've used it as a touch-up on the Brembos and the gloss finish is amazing. (see the photo below; the backing plate is chassis black, and the bracket is underhood black)
A long way to go, but once you're 'in', there's no turning back!
Bob
Attached files [img]media/attachments/15126=1852-finishings.jpg[/img] [img]media/attachments/15126=1851-shocks springs.jpg[/img] [img]media/attachments/15126=1850-wheel well.jpg[/img]
![[img]media/attachments/15126=1852-finishings.jpg[/img]](http://928oc.org/test/media/attachments/15126=1852-finishings.jpg)
![[img]media/attachments/15126=1851-shocks springs.jpg[/img]](http://928oc.org/test/media/attachments/15126=1851-shocks%20springs.jpg)
![[img]media/attachments/15126=1850-wheel well.jpg[/img]](http://928oc.org/test/media/attachments/15126=1850-wheel%20well.jpg)
Second Time Around 928 S4
Please Log in or Create an account to join the conversation.
- pcar928fan
-
- Offline
- Platinum Member
-
Less
More
- Posts: 2210
- Thank you received: 2
15 May 2013 22:05 #14759
by pcar928fan
James
78 Silver / Black-white #295
84 Ruby Red / Black AO84
88 Dark Blue / Linen-Black
92 Polar Silver / Dark Blue 92EURO
93 Arrow Blue / Black
Replied by pcar928fan on topic Wheel well cleaning
Bob, that is looking GOOD!!! Keep it up!!! I LOVE IT!
James
78 Silver / Black-white #295
84 Ruby Red / Black AO84
88 Dark Blue / Linen-Black
92 Polar Silver / Dark Blue 92EURO
93 Arrow Blue / Black
Please Log in or Create an account to join the conversation.
- gcthree
-
- Offline
- Elite Member
-
Less
More
- Posts: 329
- Thank you received: 0
16 May 2013 08:19 #14767
by gcthree
Second Time Around 928 S4
Replied by gcthree on topic Wheel well cleaning
My plan is to do at least one thing ever single day; I'm finding that there's a domino-effect going-on here. One thing clearly leads to another, and that can overwhelm you. But the one-step at a time journey is a good path.
Here's a few photos of my new luggage cover as made my Sandra in Germany. Absolutely spot-on in appearance, she is using natural materials rather than the synthetic-based materials Porsche used as OE. As much as the synthetic had some elasticity to it (much like a one size fits all baseball cap), the material deteriorated over time. My 24 year old cover would just about fall apart in your hand. The natural fibers in Sandra's cover will endure. Her email (for reference) is: This email address is being protected from spambots. You need JavaScript enabled to view it.. I am hugely impressed by her craftsmanship.
Bob
Attached files [img]media/attachments/15135=1855-closed cover.jpg[/img] [img]media/attachments/15135=1854-cover resized.jpg[/img] [img]media/attachments/15135=1856-details cover.jpg[/img]
![[img]media/attachments/15135=1855-closed cover.jpg[/img]](http://928oc.org/test/media/attachments/15135=1855-closed%20cover.jpg)
![[img]media/attachments/15135=1854-cover resized.jpg[/img]](http://928oc.org/test/media/attachments/15135=1854-cover%20resized.jpg)
![[img]media/attachments/15135=1856-details cover.jpg[/img]](http://928oc.org/test/media/attachments/15135=1856-details%20cover.jpg)
Second Time Around 928 S4
Please Log in or Create an account to join the conversation.
- gcthree
-
- Offline
- Elite Member
-
Less
More
- Posts: 329
- Thank you received: 0
16 May 2013 21:23 #14784
by gcthree
Second Time Around 928 S4
Replied by gcthree on topic Wheel well cleaning
Today's progress was assembling the right rear shock/spring, changing the bearing races in both front hubs using SKF products, and ordering 160 Italian bolts/nut for my 3-piece Speedline Alessio wheels. The previous owner allowed the polished rims to oxidize along with the bolt heads, so I will be taking the wheels apart, polishing and resealing them before mounting new tires.
One foot in front of the other...
Bob
One foot in front of the other...
Bob
Second Time Around 928 S4
Please Log in or Create an account to join the conversation.
- PCA0891
-
Topic Author
- Offline
- Junior Member
-
Less
More
- Posts: 56
- Thank you received: 0
17 May 2013 07:00 #14788
by PCA0891
Replied by PCA0891 on topic Wheel well cleaning
Hey Bob
Are you planning to be at SITM in a few weeks? I would love to see how that luggage cover looks in person.
BTW. Now that is Elbow Grease... Good luck with the process. You are right about the one thing leads to another. It could realistically go on forever. But then they would never get driven.
Are you planning to be at SITM in a few weeks? I would love to see how that luggage cover looks in person.
BTW. Now that is Elbow Grease... Good luck with the process. You are right about the one thing leads to another. It could realistically go on forever. But then they would never get driven.
Please Log in or Create an account to join the conversation.
- Ducman82
-
- Offline
- Senior Member
-
Less
More
- Posts: 124
- Thank you received: 0
17 May 2013 08:05 #14789
by Ducman82
Replied by Ducman82 on topic Wheel well cleaning
i used simple green, and A LOT of brake clean to get all the cosmoline (sp) off. soft brush and lots'o scrubbing...
Please Log in or Create an account to join the conversation.
- gcthree
-
- Offline
- Elite Member
-
Less
More
- Posts: 329
- Thank you received: 0
17 May 2013 09:36 #14791
by gcthree
Second Time Around 928 S4
Replied by gcthree on topic Wheel well cleaning
Yep. Simple Green and a soft brush for starters, and then a stiffer brush for the reluctant stuff. Brake Clean is great but it does a number on your head from the fumes.
My first car back when the earth's crust was still cooling was a VW Beetle that was a Euro delivery car that my neighbor toured Germany in, and then brought it back to the States. It was coated in cosmoline and I remember using gasoline to remove it (this was 1971....), and it worked like a charm. I'm supposedly much smarter through the passage of time, but I am tempted!
Bob
i used simple green, and A LOT of brake clean to get all the cosmoline (sp) off. soft brush and lots'o scrubbing...
Second Time Around 928 S4
Please Log in or Create an account to join the conversation.
- gcthree
-
- Offline
- Elite Member
-
Less
More
- Posts: 329
- Thank you received: 0
17 May 2013 09:58 #14792
by gcthree
Second Time Around 928 S4
Replied by gcthree on topic Wheel well cleaning
Hi Robert:
My car will not be ready for SITM, but I'll try to be there to soak-in the culture. I'll bring it along...
BTW, I'm told that the lady who makes them is a Porsche employee and does this on the sideline. I was asked to remove her URL from my Rennlist post so as not to expose her. (Makes sense...).
Bob
Hey Bob
Are you planning to be at SITM in a few weeks? I would love to see how that luggage cover looks in person.
BTW. Now that is Elbow Grease... Good luck with the process. You are right about the one thing leads to another. It could realistically go on forever. But then they would never get driven.
Second Time Around 928 S4
Please Log in or Create an account to join the conversation.
- emmanuelli
-
- Offline
- Elite Member
-
Less
More
- Posts: 425
- Thank you received: 0
17 May 2013 16:32 #14795
by emmanuelli
Replied by emmanuelli on topic Wheel well cleaning
i want i want!my plan is to do at least one thing ever single day; i'm finding that there's a domino-effect going-on here. One thing clearly leads to another, and that can overwhelm you. But the one-step at a time journey is a good path.
Here's a few photos of my new luggage cover as made my sandra in germany. Absolutely spot-on in appearance, she is using natural materials rather than the synthetic-based materials porsche used as oe. As much as the synthetic had some elasticity to it (much like a one size fits all baseball cap), the material deteriorated over time. My 24 year old cover would just about fall apart in your hand. The natural fibers in sandra's cover will endure. Her email (for reference) is: This email address is being protected from spambots. You need JavaScript enabled to view it.. I am hugely impressed by her craftsmanship.
Bob
Please Log in or Create an account to join the conversation.
- 928mac
-
- Offline
- Moderator
-
Less
More
- Posts: 3143
- Thank you received: 4
18 May 2013 10:16 #14801
by 928mac
Replied by 928mac on topic Wheel well cleaning
Good story Bob.
I have washed a lot of parts with gas and varsol but one thing I did notice as it may remove the grease but they dont mix with dirt very well. The washing with water after using gas or solvents seemed to be a must to remove the muddy gas, and then it seemed to be spotless.
after brad cleans car with gas
This image is hidden for guests.
Please log in or register to see it.
Please Log in or Create an account to join the conversation.
- gcthree
-
- Offline
- Elite Member
-
Less
More
- Posts: 329
- Thank you received: 0
19 May 2013 21:42 #14820
by gcthree
Second Time Around 928 S4
Replied by gcthree on topic Wheel well cleaning
LOL!
Just rolled back in from the garage. I bought a gallon of K1 Kerosene at Home Depot yesterday along with some Scotch Brite pads. I lightly soaked a pad and it worked perfectly! Kerosene is not unlike gasoline, and it worked just like gas did 42 years ago.
Anyone want to buy a gallon can of Acetone, Lacquer thinner or Mineral Spirits? (tried them all.....)
Bob
Second Time Around 928 S4
Please Log in or Create an account to join the conversation.
- gcthree
-
- Offline
- Elite Member
-
Less
More
- Posts: 329
- Thank you received: 0
19 May 2013 21:43 #14821
by gcthree
Second Time Around 928 S4
Replied by gcthree on topic Wheel well cleaning
Robert:
BTW, Sandra sent along a large swatch of the material she uses for the cover. I'm happy to send along a piece to you? Let me know...
Bob
BTW, Sandra sent along a large swatch of the material she uses for the cover. I'm happy to send along a piece to you? Let me know...
Bob
Hey Bob
Are you planning to be at SITM in a few weeks? I would love to see how that luggage cover looks in person.
BTW. Now that is Elbow Grease... Good luck with the process. You are right about the one thing leads to another. It could realistically go on forever. But then they would never get driven.
Second Time Around 928 S4
Please Log in or Create an account to join the conversation.
- PCA0891
-
Topic Author
- Offline
- Junior Member
-
Less
More
- Posts: 56
- Thank you received: 0
20 May 2013 12:17 #14823
by PCA0891
Replied by PCA0891 on topic Wheel well cleaning
Hi Bob.
I would appreciate a small sample if it's not to much trouble.
Good luck with your project. I envy your motivation.
PM sent
I would appreciate a small sample if it's not to much trouble.
Good luck with your project. I envy your motivation.
PM sent
Please Log in or Create an account to join the conversation.
- gcthree
-
- Offline
- Elite Member
-
Less
More
- Posts: 329
- Thank you received: 0
20 May 2013 19:16 #14828
by gcthree
Second Time Around 928 S4
Replied by gcthree on topic Wheel well cleaning
Motivation? More like an incurable disease that began with the 911 RS replica that I built in the late 80's and then showed it in PCA Concours shows (and running it in track events). If something isn't exactly perfect mechanically and cosmetically, I can't sleep at night.
For example, I removed the 928 rear spring/shocks to disassemble/clean/refinish; not to replace the wheel bearings and take apart the CV joints would have troubled me to no end. Might as well pull down the exhaust system while I'm at it so I could properly apply the stainless steel coating and replace the O2 sensor. Will it ever end?
For example, I removed the 928 rear spring/shocks to disassemble/clean/refinish; not to replace the wheel bearings and take apart the CV joints would have troubled me to no end. Might as well pull down the exhaust system while I'm at it so I could properly apply the stainless steel coating and replace the O2 sensor. Will it ever end?
Second Time Around 928 S4
Please Log in or Create an account to join the conversation.
- gcthree
-
- Offline
- Elite Member
-
Less
More
- Posts: 329
- Thank you received: 0
21 May 2013 14:35 #14842
by gcthree
Second Time Around 928 S4
Replied by gcthree on topic Wheel well cleaning
Wheel wells...wheels. Got to take them off to get to the other.
I put these Speedline 3-piece Alessio wheels on the car in 1995, and they were still intact in 2013 when I bought my car back from the current owner. However, like the undercarriage, it was just driven. Neglected is a strong word.
I'm replacing all the wheel bolts (good thing as they were rusted!) and then cleaning/polishing them. Nothing but elbow grease and some great chemicals.
I did 2 hard passes with Meguiar's 'Rain Spot Remover' to erase the surface oxidation of the rims, and then 2 final polishes with 'Flitz' polish, which is unlike anything I've ever used! Unbelievably great product that absolutely works!
Bob
Attached files [img]media/attachments/15210=1860-After.jpg[/img] [img]media/attachments/15210=1859-Before.jpg[/img]
![[img]media/attachments/15210=1860-After.jpg[/img]](http://928oc.org/test/media/attachments/15210=1860-After.jpg)
![[img]media/attachments/15210=1859-Before.jpg[/img]](http://928oc.org/test/media/attachments/15210=1859-Before.jpg)
Second Time Around 928 S4
Please Log in or Create an account to join the conversation.
- wallyp
-
- Offline
- Premium Member
-

Less
More
- Posts: 218
- Thank you received: 2
21 May 2013 16:37 #14844
by wallyp
Wally Plumley
928 Specialists
www.928gt.com
Replied by wallyp on topic Wheel well cleaning
"Anyone want to buy a gallon can of Acetone, Lacquer thinner or Mineral Spirits? (tried them all.....)"
Get a quart of Dexron VI, mix with a quart of acetone, and have a lifetime supply of the best penetrant oil available.
Always good to have some solvents around - just be aware of the fire hazard.
Get a quart of Dexron VI, mix with a quart of acetone, and have a lifetime supply of the best penetrant oil available.
Always good to have some solvents around - just be aware of the fire hazard.
Wally Plumley
928 Specialists
www.928gt.com
Please Log in or Create an account to join the conversation.
Moderators: Rich928, billvvOC